
Traffic safety depends on many factors. Turn signals are definitely one of them. It probably happened to you that you were driving, and suddenly a vehicle in front of you decided to turn left or right without using turn signals.
This may all end well if you are not on a frequent road, but things change if you find yourself in a crowded city, and let’s say it is winter season and icy road. Then it can be very dangerous and challenging for you to stop since you could easily bump into the vehicle in front of you.
This means that using turn signals is very important to prevent traffic accidents which could lead to severe damages to your vehicle and the rider itself, especially motorcycle riders.
With that being said, there are two reasons why the driver in front of you didn’t use his turning signals. The first one is his simple irresponsibility where he doesn’t think that this kind of behavior could lead to traffic accidents and we can’t affect this reason. The second reason is turning signals malfunction, and this is what this article is all about.
In this article, we are going to teach you how to fix your motorcycle turn signals and all the tools and parts required to do this kind of project.
So how do you fix motorcycle turn signals (turn lights)? Remove the fairing first and disconnect the wiring second. After disconnecting the wiring from the old turn signals, take the new one and reconnect the wiring. Put the fairing back to its place; after doing so, test the turning lights.
Further on we will explain in a more detailed way how to replace the lights and the most common problems that can happen.
Table of Contents
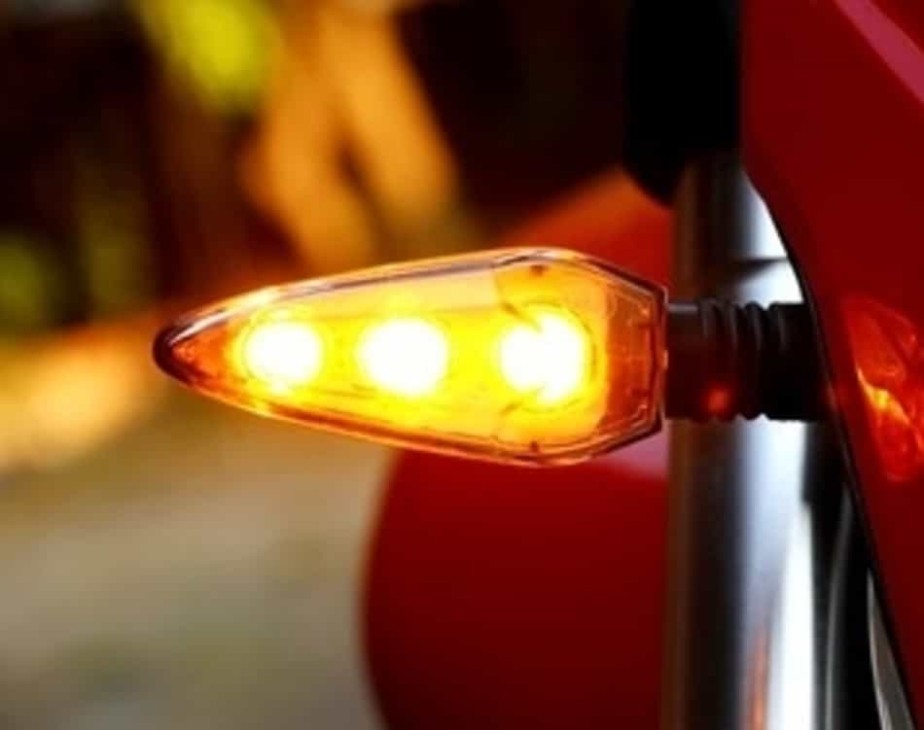
How to Replace Motorcycle Turn Signals
Replacing turn signals requires some specific tools and parts, and we will show you precisely what you need:
- New turn motorcycle signal lights
- Measuring tape
- Wrench
- Solder
- Soldering iron
- Color coded tape
After you have gathered the required parts and tools, follow the next step by step guide on how to fix your turn signals.
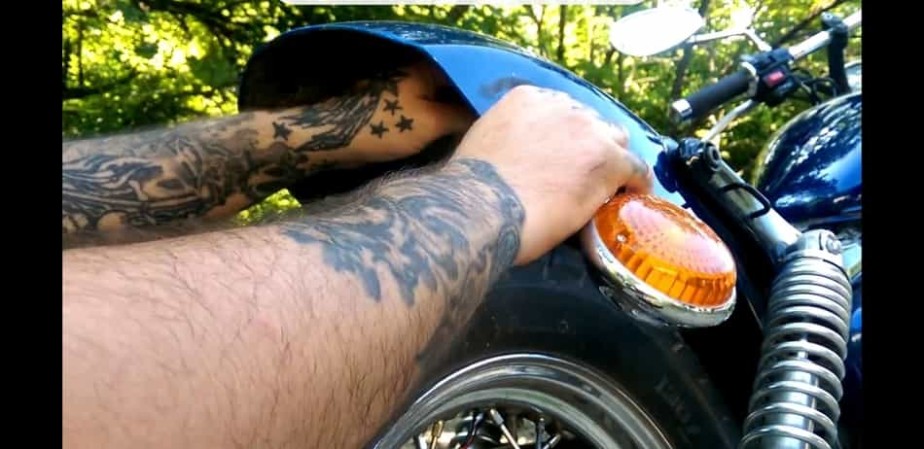
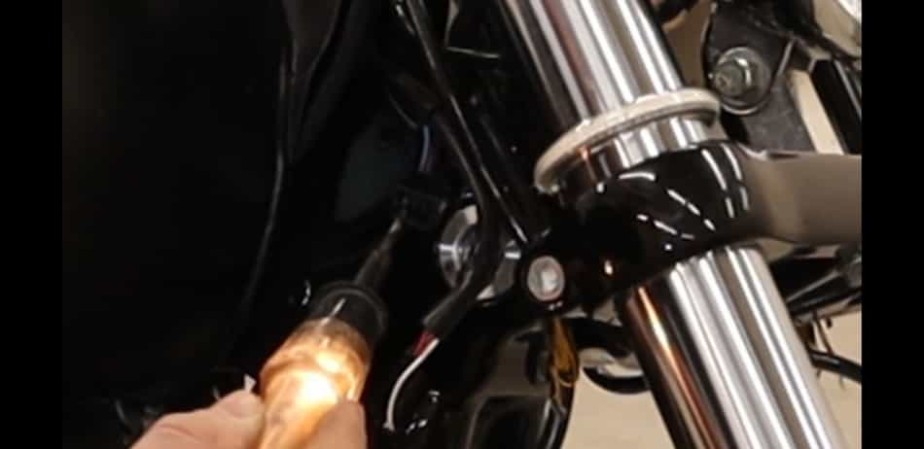
Step 1- Preparation Work
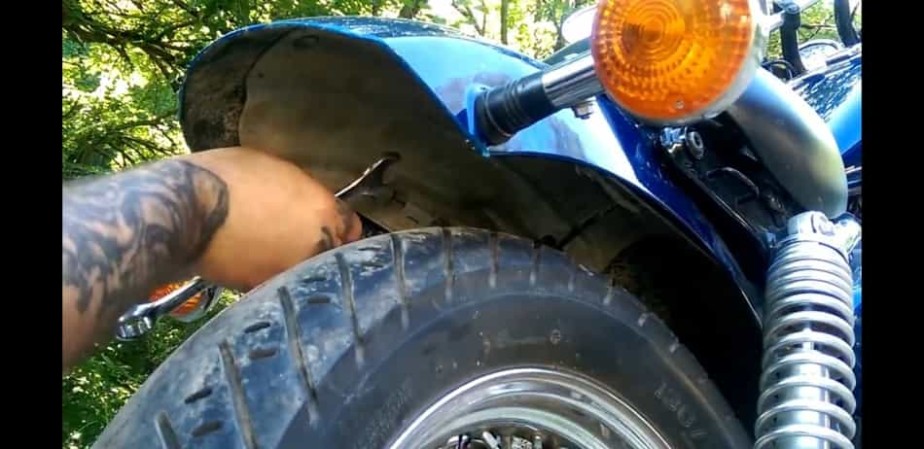
Take off the motorcycle’s lower fairing to prevent any damages. You will have easier access to the wires of the turn signals on the front once you remove the fairing.
Step 2- Wiring
The motorcycle turn signals wiring has to be placed both on the front and the rear. The rear motorcycle turn signals wiring is generally placed underneath the seat. It may also be placed at the back, in which case you will need to take off the tail.
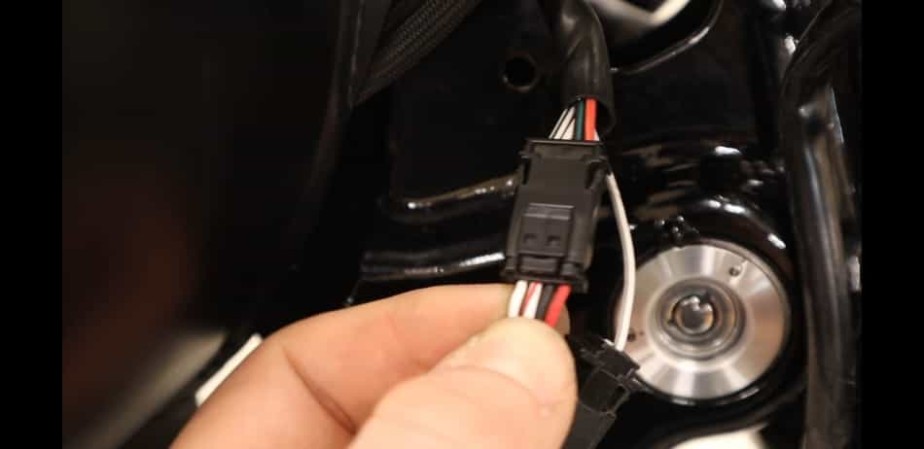
Step 3- Color Coding
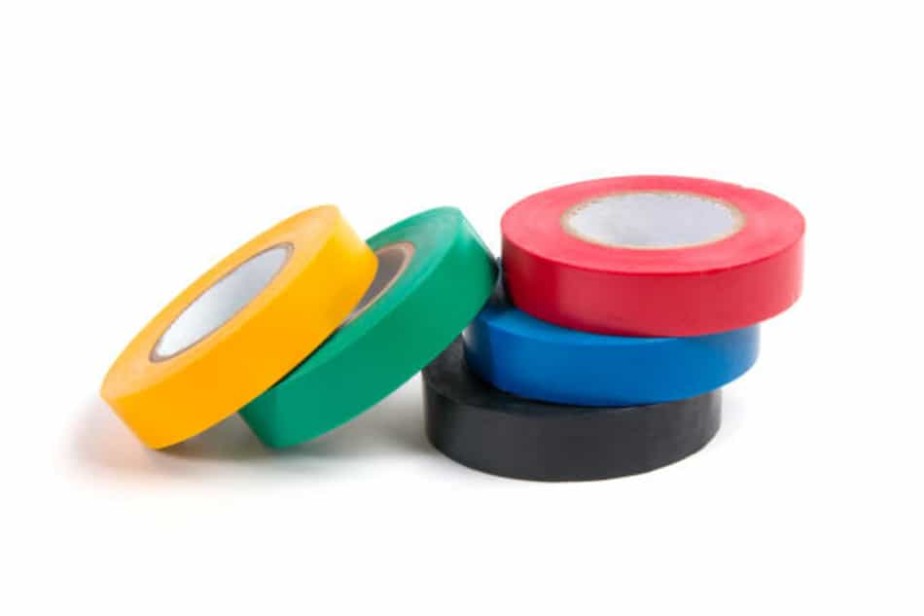
Color coding helps you in connecting the wires and makes the whole process easier. If your wires are not colored, sticking distinct tapes would be smart to do so you don’t have any problems reconnecting the wires.
Step 4- Disconnect The Wiring
Once you mark the wiring, disconnect the wiring of the turn lights. If you notice that the turn lights are connected by box connection, you will need to clip off the female and male ends.
Step 5- Locate The Bolt
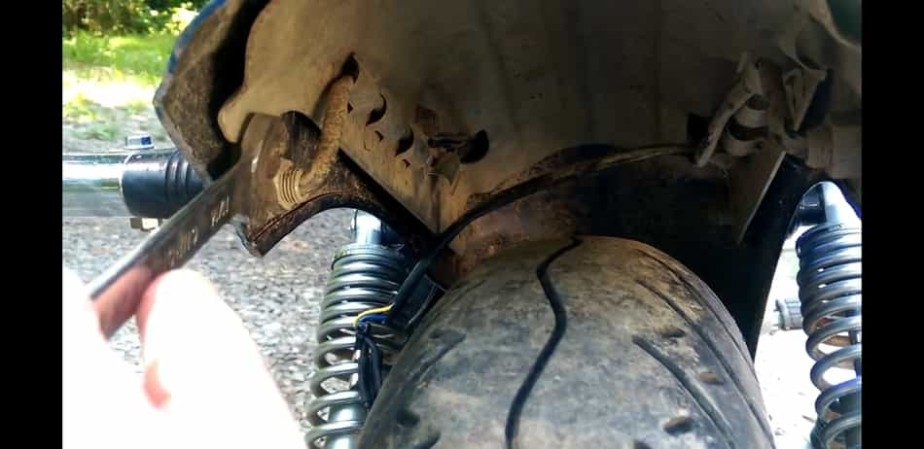
Find the bolt holding the turn lights in position. Most of the time, the bolt is held by screws and washers.
Step 6- Remove The Bolt
Remove the bolt; take a wrench, and slide the lights out of the motorcycle after taking the screw off.
Step 7- Insert The New Motorcycle Turn Signals
After taking the old motorcycle turn signals out, you are ready to place the new one. You need to route the wires on the motorcycle turn lights through a rubber grommet and follow the route of the old motorcycle turn lights location.
Step 8- Fasten
Once you established the wiring, but the new turn lights in the housing and connect them correctly.
Step 9- Wiring
Connect the motorcycle turn lights to the right slots. You shouldn’t have any problems if the wires are color-coded. If they are not, you should also connect them without any confusion since you marked them earlier.
Step 10- Box Connector
You would need to connect the wiring manually if the new motorcycle turn lights didn’t come with a box connector. Take the wire, cut off half of an inch of plastic, and solder the wire along with the old motorcycle wires.
Step 11- Test The Lights
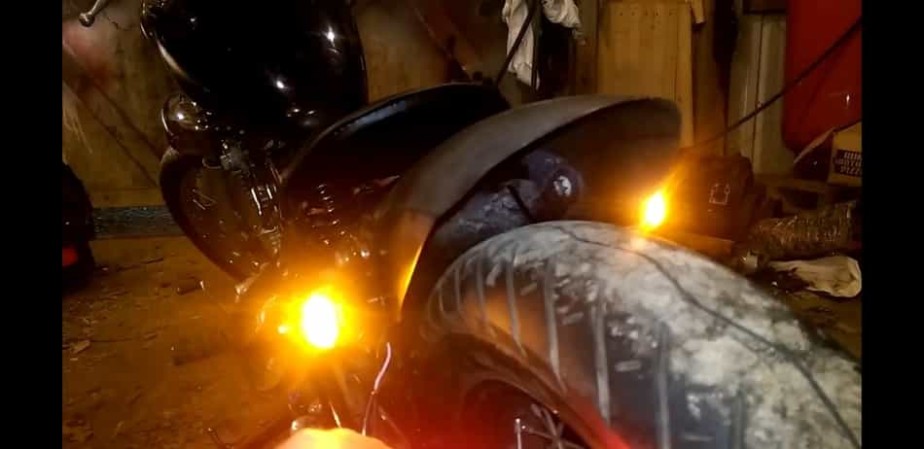
Completing step 10 means that you installed the new motorcycle turn lights. Now is the time to test new turn lights and see if you have correctly done all the previous steps. Turn on the power and check if the turn lights are functioning.
Step 12 – Final Step
Once you tested the lights and you concluded that everything is done right, assemble the fairing. Return on the tail if you previously took it off. Do one last check to ensure that all the previously removed pieces are now back reconnected.
Most Often Turn Signals Problems
Blown Bulb
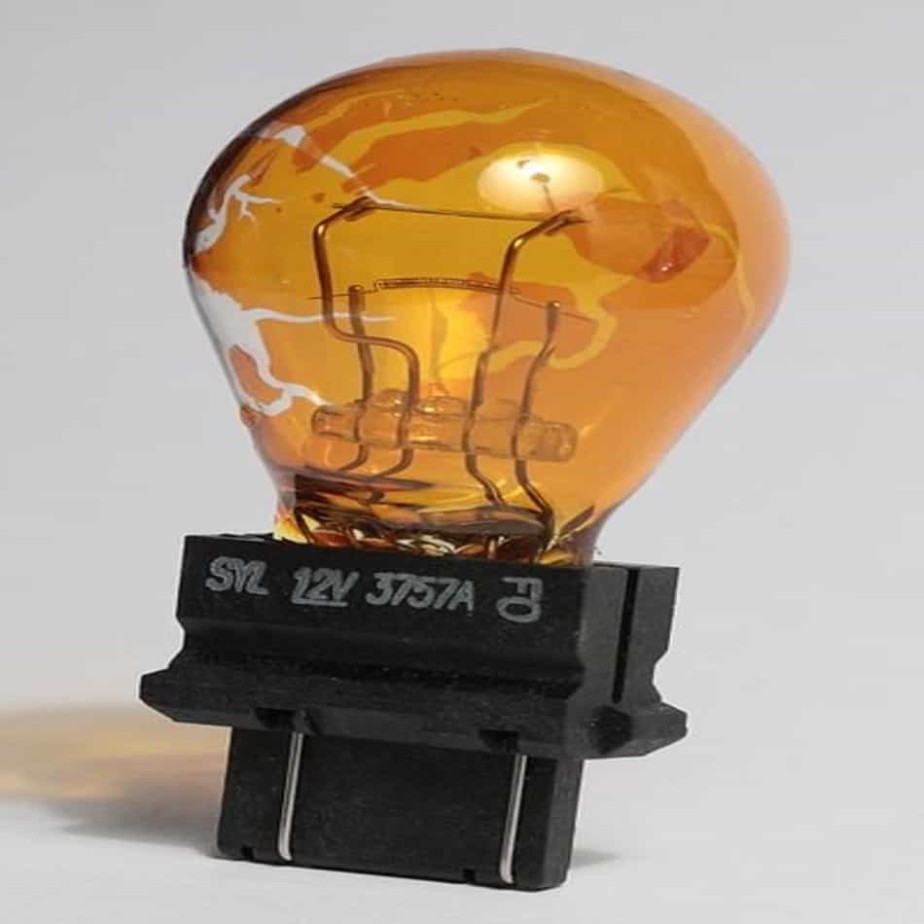
This issue happens when one of the light bulbs has burnt out. To fix this problem, you simply replace your burnt bulb with a new one. Some riders choose to replace their bulbs with LED lights, although LED lights can lead to other issues. That’s why you should stick with the bulbs specified in your owner’s manual and replace them with incandescent bulbs (if not mentioned differently).
IMPORTANT: Do not touch the glass bulbs with your bare hands because it will leave the oil from your hands which will stain the glass bulbs as it heats up. Have a pair of gloves or clean cloth that you will use to replace the bulb.
Blown Fuse
Inspect the tail light and indicators fuse and make sure that they are correct. Moisture can cause a lot of damage to the fuse and the bulb. This will lead to a blown fuse. Get a new fuse and replace the blown one. Dry the moisture before replacing the fuse.
Ground Wire Faulty
This problem happens when one of the turn signal wires is reversed or grounded improperly, which leads to a short circuit and turn lights not flashing. All wires must be tight and make sure there are no signs of corrosion on the terminals. Electrical issues such as turn lights not flashing can be caused by bad ground.
Note: You will need to track down the wire and double-check every connection. Check the battery’s terminal because the gassing of the battery acid can lead to corrosion.
Flat Battery
Check your motorcycle’s battery voltage because a shortage can lead to a significant power drain. A flat battery can result in not delivering enough power to the turn signals. A completely charged battery must be over 12.6 volts, ideally, measure 12.6-13.5 volts between terminals depending upon its chemistry.
Here you can check a nice video on How To Remove Or Replace Rear Motorcycle Turn Signals | Xv250 & More | Bobber Build:
Conclusion
Functional turn signals are one of the essential traffic safety features; that is why we need to take care of them and check their correctness before every ride. This article will help you replace or fix the turn signals, so you don’t end in dangerous situations where you cannot signal the direction you intend to turn.
We hope you enjoyed reading and that you will find much other helpful information in our other articles.