
Having a motorcycle represents a great joy to most riders; however, there are some things that we don’t like and would like to avoid at all costs, like falling off the bike, for instance. I think that every rider has dealt with this situation. For those who haven’t, it is probably just a matter of time when it happens (it doesn’t have to be in a ride, and we hope you never fall during the ride and high speed, your motorcycle can fall while standing on its kickstand) and you will need to lift it from the ground.
So how do you lift your motorcycle? There are two options for lifting your motorcycle. The first is using your body strength to lift your bike if you fall during the ride or if your bike falls from the kickstand. The second is using a motorcycle lift, and this option is used during motorcycle maintenance and repair operations.
Further in this article, you will get a more detailed explanation and things you need to look after while lifting your bike off the ground.
Table of Contents
How to Lift a Motorcycle?
Motorcycles are heavy objects, and you need to be careful while lifting them since they are ergonomically and mechanically complex. Lifting a motorcycle sounds very easy (of course, if your bike is not pretty heavy) to most riders; however, there is a correct way to do so, and most bikers do it the wrong way. One thing to have in mind (if the motorcycle is fuel injected) is to turn off the engine when lifting a fallen motorcycle because it will still run independently of it being on the ground.
CAUTION: If a rider doesn’t turn off the engine or press the clutch while the motorcycle is still running, and the bike is IN A GEAR and NOT IN THE NEUTRAL POSITION, what will happen if your bike starts to go in the direction that you point it in. This can be very dangerous for you, anyone near you, or other objects in your nearby.
Now that we have told you what you need to pay attention to, the next thing that we will show you is a step-by-step guide on lifting your motorcycle off the ground. After we show you this, we will also show you how to raise your bike using a motorcycle lift (jack).
How to Lift a Fallen Motorcycle?
Step 1: Turn off the Engine
You need to turn off your engine, and the reason for that is to ensure the safety of yourself, anyone around you, and any objects around you.
Step 2: Place Your Motorcycle in a Gear

You need to put your motorcycle in gear, and to do so, you have to press and hold the clutch and put your bike in gear. By doing so, you will lock your back wheel, and it won’t be able to rotate, which means that your bike will stay still, and although your bike’s engine won’t be able to move because the engine is turned off, the bike could still move if it is in the neutral position since in this position the rear wheel can still rotate. Placing a motorcycle in gear allows you to lift it without having to hold the brake.
Note: Make sure that you put your bike in gear before lifting it off the ground.
Step 3: Place the Handlebar to the Ground
Make sure that you position your handlebar to the ground, and what you will achieve by doing so is to set your front wheel to the sky, which will give you leverage, and you will be capable of lifting your motorcycle much easier.
Step 4: Open the Kickstand
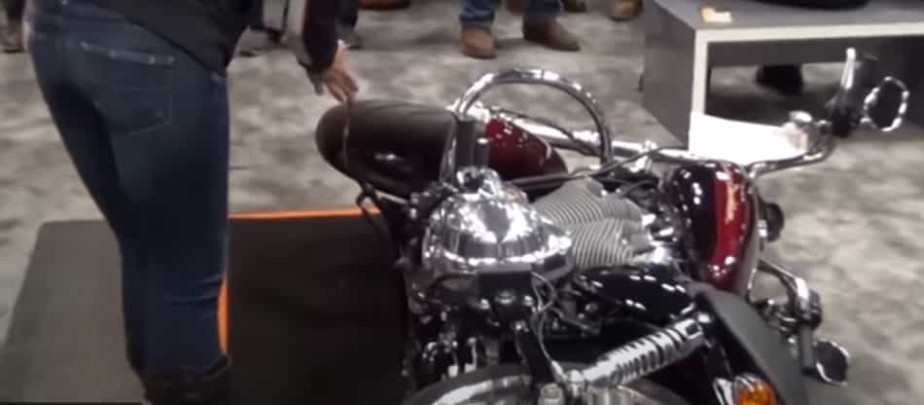
Kick your kickstand and make sure it is locked and secured. Your bike will roll over to the other side when you lift it and try to place it on the kickstand without placing and securing the stand (some riders just release their bike on the left side instinctively without putting the stand previously, which then results in motorcycle falling and hitting the ground again)
Step 5: Position Yourself Against the Bike
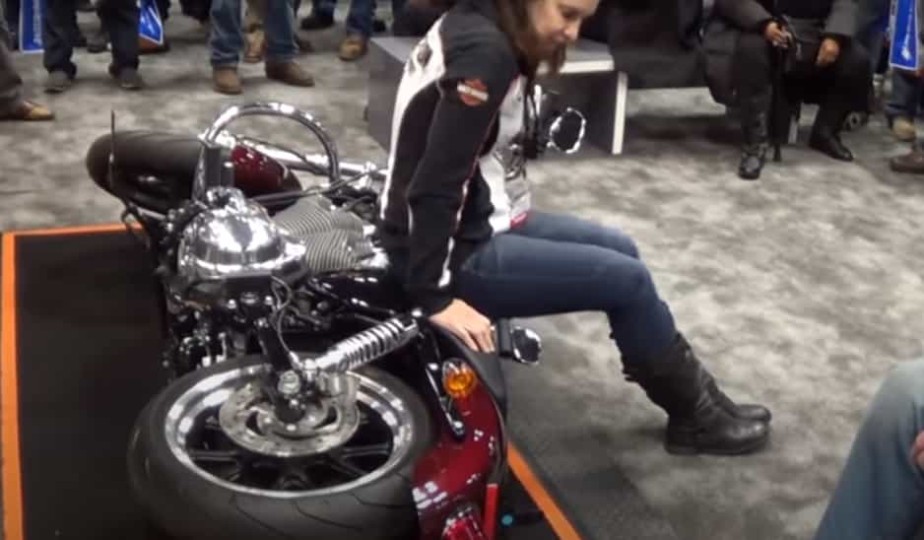
You need to sit on the upper position of your seat with your knees bent because that will enable you to use leverage and make most of your strength while lifting the motorcycle from the ground. Another valuable reason for you is that when you position yourself that way against the bike, you will also avoid getting dirty or at least lower the odds of falling on the pebble, which makes the ground slippery, resulting in you falling.
Step 6: Where to Put Your Hands
Positioning your hands properly will ease you through this process very much. That’s why you need to put one of your hands on the handlebar on the side that is touching the ground while you need to use the other hand to grab the rear fender. If you have short hands and you feel like you won’t be able to hold the bike with a firm grip, then you focus just on grabbing either the rear fender or just the handlebar.
Step 7: Lift Your Motorcycle
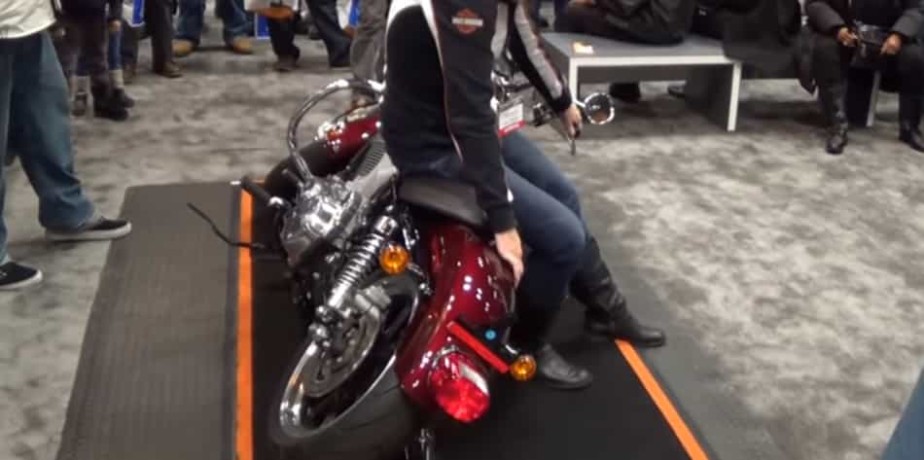
You will lift your motorcycle using the force and strength of your entire body, but mostly your legs and back. This lifting process may look like you are performing deadlifts or reverse deadlifts (for those who don’t know what deadlift is, it is a workout performed in a gym using a bar and weights). Holding your motorcycle as firmly as possible, you need to lean back while your feet must be locked to the firm ground.
CAUTION: Be careful while lifting your motorcycle; you don’t want to get injured in this process, avoid pebble or dust because you will slip and fall, if your motorcycle is on a dusty road, take something to clean the surface where you plan to position your legs, so you don’t slip and fall.
You need to lean back as long as you don’t feel that your bike has tipped over to the other side and positioned itself on the kickstand you locked and secured in the 4th step. For riders with bigger bikes like cruisers, you will need to put more effort, especially if the motorcycle has large saddlebags on its sides.
If the saddlebag is placed on the motorcycle’s side that hits the ground, you will need to lean back until you get to the midway. Once you reach the midway, you need to position yourself lower on the seat. After you positioned yourself in the optimal spot, lean the motorcycle over the side of the stand side (don’t forget to set and secure the stand before tripping the bike to that side).
Here is an excellent video showing how to lift your motorcycle using your body weight:
How to Lift Your Motorcycle Using a Lift (Jack)?
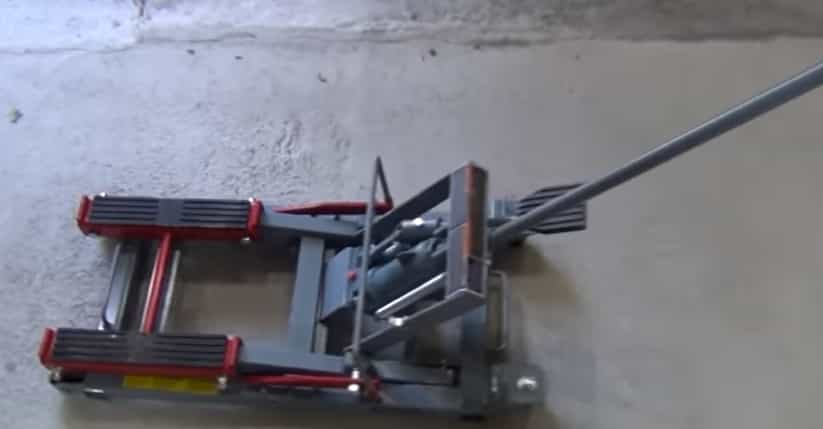
Lifting your motorcycle with a lift (jack) is different than lifting your bike from the ground using the strength of your body. Using a jack to lift your bike is mainly used when performing repairing or maintaining processes on your motorcycle. The reason for that is that your bike needs to be stable and secure.
Now, we will lead you through a step-by-step guide on how to lift your motorcycle using a jack (lift), so stay with us because we think that this guide can help you save your time and, most importantly, prevent any injuries happen.
Step 1: Look for a Proper Space
When you lift your motorcycle, you need to make sure that you do it on flat and solid ground. The best place to lift your bike is your garage (of course, if you have a garage); if you live in an apartment and don’t have a garage, you need to do it on asphalt or concrete.
Note: The reason why you need to do it on solid ground is to prevent your motorcycle from falling because it will cause more damage to your bike, any other object that may be close by, or the worst-case scenario, to you or anyone helping you, especially if you lay underneath the motorcycle.
Step 2: Check Your Motorcycle and the Surface
You need to check your motorcycle from underneath visually; this needs to be done to see that your bike is lifted correctly. Some jacks can be malfunctioned and raise your motorcycle uneven, which means that your motorcycle will hang to one side. If your bike hangs to one side, especially if it is a heavy bike (all bikes are heavy, but cruisers are a different class when we consider their weight), there is an excellent possibility that it will fall and cause a lot of expensive damage ( to your bike, and possibly any nearby object) or the worst-case scenario hurt you.
Step 3: Stabilize Your Motorcycle
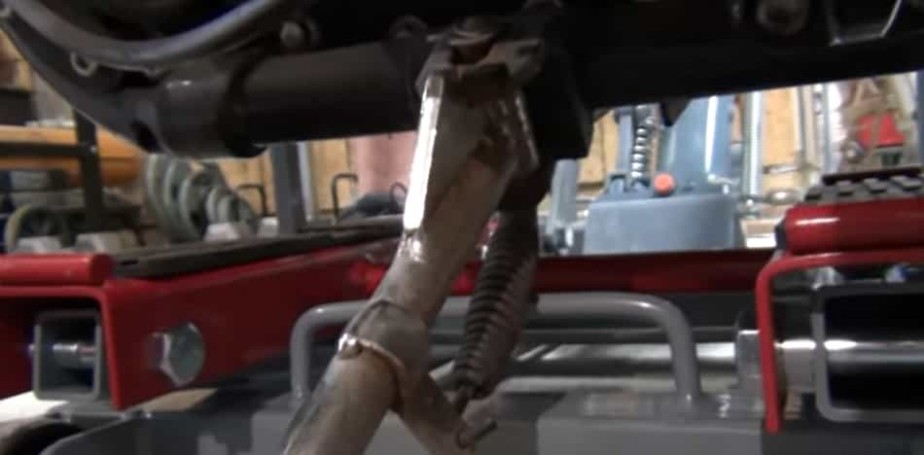
Stabilize your motorcycle by placing blocks underneath your kickstand so your bike is not inclined on one side but is equally balanced. It would be very useful if someone could help you in this step (although you can do it on your own) to press and hold the brake lever while you are at your motorcycle’s back end setting up the balance of your motorcycle.
Step 4: Fasten the Motorcycle to The Jack
Fasten your motorcycle to the motorcycle jack with two ratcheting tie-down straps. You will make your bike balanced, which will let you work on it without worrying about the bike falling off the lift.
Step 5: Prepare the Jack
Place your jack underneath the motorcycle. If you have a center stand, place it in the way that it is in the middle of the two rubber platforms on the lift.
Step 6: Lift the Jack
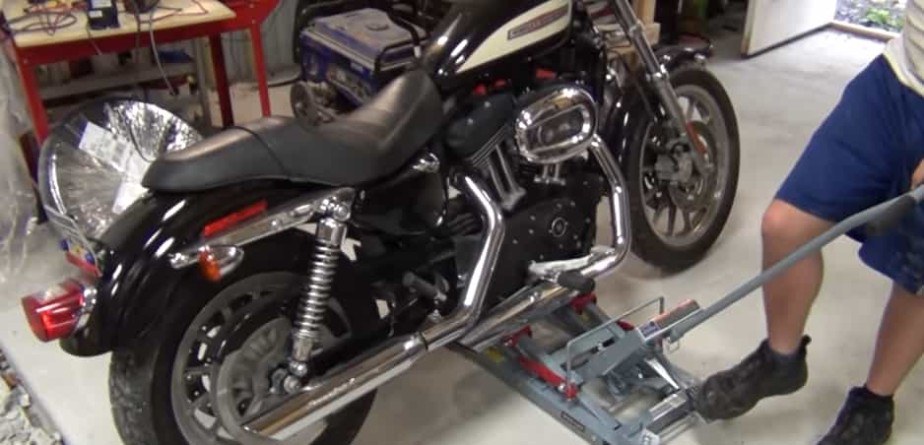
Your bike needs to be steady and balanced as much as possible while you lift the jack. You will use a foot pedal placed on the jack to lift the jack.
Step 7: Position the Jacks Stands
You need to put one stand under every wheel. After you have done that, you can release the jack and unlock the wheels. Once you have secured your bike and double-checked its safety, you can start working on it.
Here is a great video showing how to lift your motorcycle using a motorcycle jack:
Final Thoughts
Lifting your motorcycle is a process like any other. It takes knowledge and experience. There are differences between lifting your motorcycle from the ground (in case of falling off the motorcycle) and using a motorcycle jack (lift) to lift your motorcycle when you intend to perform some kind of maintenance work or repair.
I would recommend you to be careful with lifting your motorcycle, and if you need any help in doing so, don’t feel like you are weak or something similar. A good friend will always help you in this kind of operation, remember your safety and the safety of others should be your top priority.
We hope you learned everything you need to know about lifting your motorcycle.
